
Quickstart
Before you start: Ensure that you have a newer version of Unity. The steps in this document were tested on version 2021.3.26f1.
Multiplayer packages
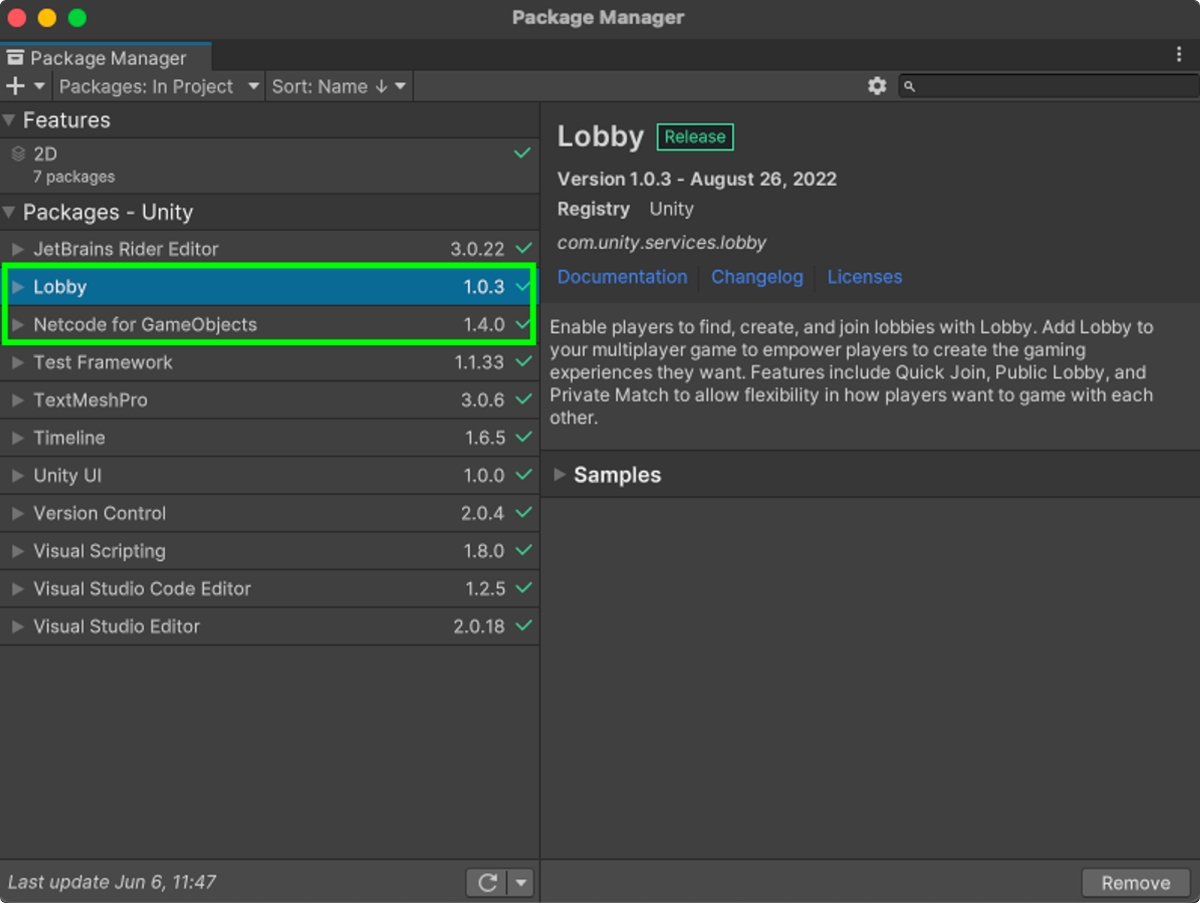
Install Netcode for GameObjects and Lobby in the Unity package manager.
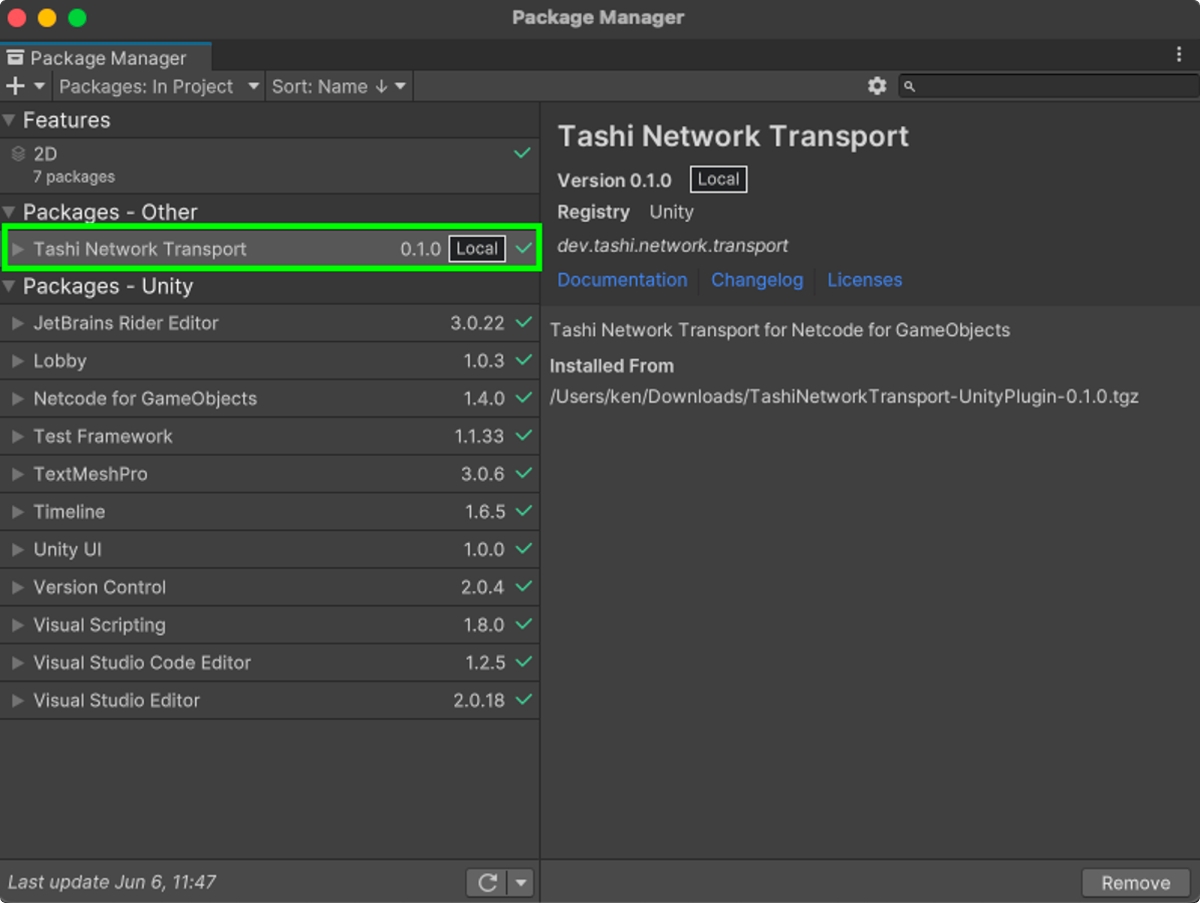
Install TNT for Unity
Download the Tashi Network Transport for Unity SDK
Install the SDK via Unity's Package Manager by:
Open
Window > Package ManagerPress
+and chooseAdd package from tarball...Select the Tashi Network Transport file
Press
Install
Configure multiplayer
Now that you've installed the appropriate Unity and Tashi packages, it's time to set up multiplayer and initialize a Tashi session.
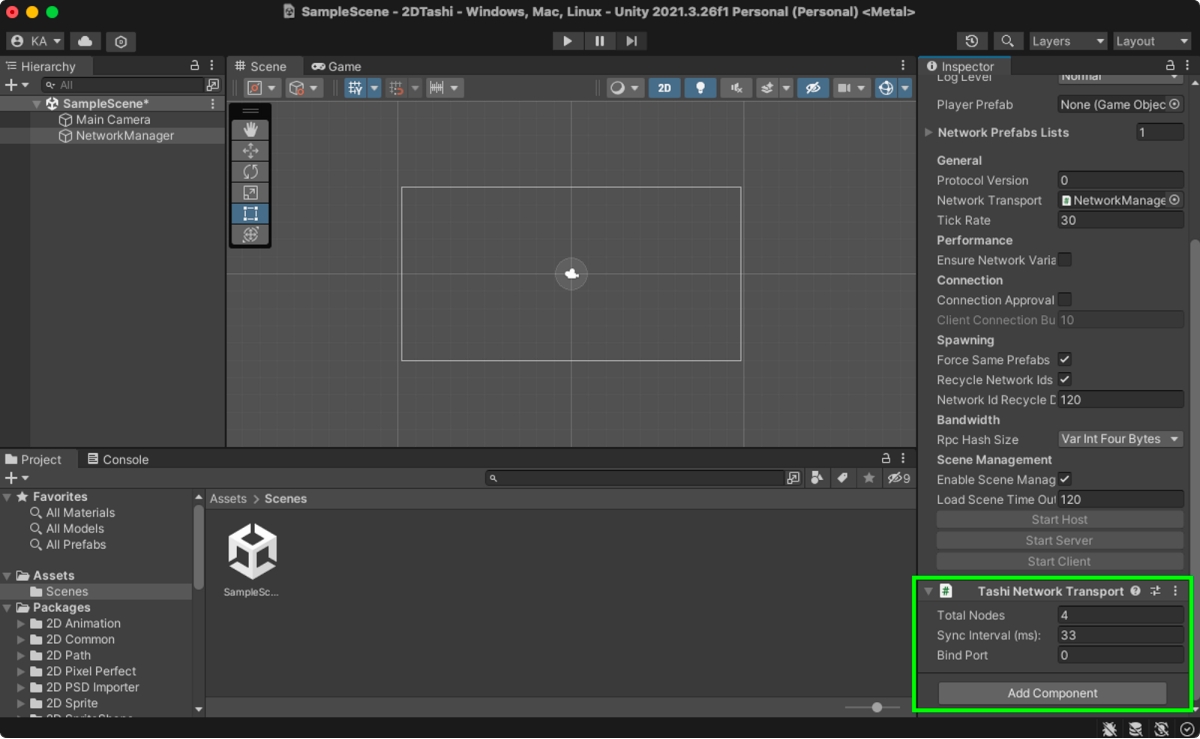
First you want to create an object in your project that contains the NetworkManager component.
Next, you want to set the network transport in your NetworkManager configuration to TashiNetworkTransport:

Now you define the Tashi Network Transport parameters:
Initialize a session
Now that Tashi Network Transport for Unity has been installed and configured in the Unity IDE, you now have access to the necessary scripting classes that allow you to:
connect to a Lobby or game session initializer
pass around your player address book information
start a direct peer-to-peer leaderless gaming session
Below are code snippets from an example performing the steps to starting a Tashi gaming session using Unity's Lobby:
Import the TNT
Instantiate the transport
Get local data
Send local data
Construct address book
The Tashi Network Transport has now been initialized and is facilitating multiplayer gaming. You can configure all other multiplayer objects as you normally would.
Each player must have their own Profile ID for Unity Lobby to recognize multiple players.